Spring Boot上で独自ログイン画面上でSpring Securityの認証を行ってみた
今回は、Spring Securityを利用して、独自ログイン画面を作成した上で、Spring Securityの認証処理を実装してみたので、そのサンプルプログラムを共有する。
前提条件
下記記事の実装が完了していること。

サンプルプログラムの作成
作成したサンプルプログラムの構成は以下の通り。
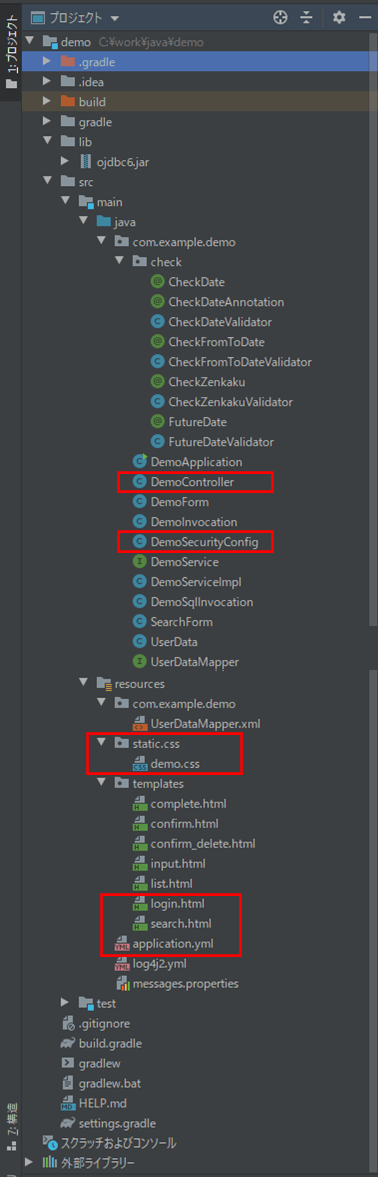
なお、上記の赤枠は、前提条件のプログラムから変更したプログラムである。
Spring Securityの認証方法の定義を行うJavaソースの内容は以下の通り。
package com.example.demo;

import org.springframework.context.annotation.Configuration;
import org.springframework.security.config.annotation.authentication.builders.AuthenticationManagerBuilder;
import org.springframework.security.config.annotation.web.builders.HttpSecurity;
import org.springframework.security.config.annotation.web.builders.WebSecurity;
import org.springframework.security.config.annotation.web.configuration.EnableWebSecurity;
import org.springframework.security.config.annotation.web.configuration.WebSecurityConfigurerAdapter;
import org.springframework.security.web.firewall.DefaultHttpFirewall;

@Configuration
@EnableWebSecurity
public class DemoSecurityConfig extends WebSecurityConfigurerAdapter {

    @Override
    public void configure(WebSecurity web) {
        //org.springframework.security.web.firewall.RequestRejectedException:
        //The request was rejected because the URL contained a potentially malicious String ";"
        //というエラーログがコンソールに出力されるため、下記を追加
        DefaultHttpFirewall firewall = new DefaultHttpFirewall();
        web.httpFirewall(firewall);
    }

    /**
     * SpringSecurityによる認証を設定
     * @param http HttpSecurityオブジェクト
     * @throws Exception 例外
     */
    @Override
    protected void configure(HttpSecurity http) throws Exception {
        //初期表示画面を表示する際にログイン画面を表示する
        http.formLogin()
                //ログイン画面は常にアクセス可能とする
                .loginPage("/login").permitAll()
                //ログインに成功したら検索画面に遷移する
                .defaultSuccessUrl("/")
                .and()
                //ログイン画面のcssファイルとしても共通のdemo.cssを利用するため、
                //src/main/resources/static/cssフォルダ下は常にアクセス可能とする
                .authorizeRequests().antMatchers("/css/**").permitAll()
                .and()    //かつ
                //それ以外の画面は全て認証を有効にする
                .authorizeRequests().anyRequest().authenticated()
                .and()    //かつ
                //ログアウト時はログイン画面に遷移する
                .logout().logoutSuccessUrl("/login").permitAll();
    }

    /**
     * メモリ上にユーザー・パスワードを格納する処理
     * @param auth 認証マネージャー生成ツール
     * @throws Exception
     */
    @Override
    protected void configure(AuthenticationManagerBuilder auth) throws Exception {
        //ユーザー名「user」、パスワード「pass」が入力されたらログイン可能とする
        //パスワードエンコーダーを利用しないようにするため、パスワードの先頭に{noop}を
        //指定している
        auth.inMemoryAuthentication()
                .withUser("user").password("{noop}pass").roles("USER");
    }
}
configure(HttpSecurity http)メソッドでログイン・ログアウトの認証設定を行い、configure(AuthenticationManagerBuilder auth)メソッドでユーザー・パスワードの格納処理を行っている。また、新規作成するログイン画面でCSSファイルを利用できるようにするよう、「src/main/resources/static/css」フォルダ下を常にアクセス可能にする設定を行っている。
CSSファイルの内容は以下の通りで、ファイルパスを、「src/main/resources/static/css」フォルダ下に変更している。内容は特に変更していない。
.errorMessage{
    color: #FF0000;
}
.fieldError{
    background-color: #FFCCFF;
}
また、コントローラクラスには、以下のログインメソッドの追加を行っている。
/**
 * ログイン画面に遷移する
 * @return ログイン画面へのパス
 */
@GetMapping(path = "/login")
public String login(){
    return "login";
}
さらに、ログイン画面の内容は以下の通り。
<!DOCTYPE html>
<html lang="ja" xmlns:th="http://www.thymeleaf.org">
<head>
    <meta charset="UTF-8">
    <link th:href="@{/css/demo.css}" rel="stylesheet" type="text/css" />
    <title>ログイン画面</title>
</head>
<body>
    <div th:if="${param.error}" class="errorMessage">
        ユーザー名またはパスワードが誤っています。
    </div>
    <form method="post" th:action="@{/login}">
       <table border="0">
           <tr>
               <td align="left" valign="top">ユーザー名:</td>
               <td>
                   <input type="text" id="username" name="username" />
               </td>
           </tr>
           <tr>
               <td align="left" valign="top">パスワード:</td>
               <td>
                   <input type="password" id="password" name="password" />
               </td>
           </tr>
       </table>
       <br/><br/>
       <input type="submit" value="ログイン" />
   </form>
</body>
</html>
「<form method=”post” th:action=”@{/login}”>」と、th:action属性を利用することにより、独自メソッドでなく、Spring Securityに備わっているログイン認証処理が実行されるようになっている。さらに、Spring Securityのデフォルト値に合わせ、ユーザー名は「username」、パスワードは「password」を利用している。

また、検索画面の内容は以下の通り。
<!DOCTYPE html>
<html lang="ja" xmlns:th="http://www.thymeleaf.org">
<head>
    <meta charset="UTF-8">
    <link th:href="@{/css/demo.css}" rel="stylesheet" type="text/css" />
    <title>index page</title>
</head>
<body>
    <p>検索条件を指定し、「検索」ボタンを押下してください。</p><br/>
    <form method="post" th:action="@{/search}" th:object="${searchForm}">
        <!-- 2行エラーがある場合は、エラーメッセージを改行して表示 -->
        <span th:if="*{#fields.hasErrors('fromBirthYear')}"
              th:errors="*{fromBirthYear}" class="errorMessage"></span>
        <span th:if="*{#fields.hasErrors('fromBirthYear') && #fields.hasErrors('toBirthYear')}">
            <br/>
        </span>
        <span th:if="*{#fields.hasErrors('toBirthYear')}"
              th:errors="*{toBirthYear}" class="errorMessage"></span>
        <table border="1" cellpadding="5">
            <tr>
                <th>名前</th>
                <td><input type="text" th:value="*{searchName}" th:field="*{searchName}" /></td>
            </tr>
            <tr>
                <th>生年月日</th>
                <td><input type="text" th:value="*{fromBirthYear}" size="4"
                           maxlength="4" th:field="*{fromBirthYear}" th:errorclass="fieldError"/>年
                    <select th:field="*{fromBirthMonth}" th:errorclass="fieldError"
                            th:classappend="${#fields.hasErrors('fromBirthYear')} ? 'fieldError'">
                        <option value=""></option>
                        <option th:each="item : *{getMonthItems()}"
                                th:value="${item.key}" th:text="${item.value}"/>
                    </select>月
                    <select th:field="*{fromBirthDay}" th:errorclass="fieldError"
                            th:classappend="${#fields.hasErrors('fromBirthYear')} ? 'fieldError'">
                        <option value=""></option>
                        <option th:each="item : *{getDayItems()}"
                                th:value="${item.key}" th:text="${item.value}"/>
                    </select>日~
                    <input type="text" th:value="*{toBirthYear}" size="4"
                           maxlength="4" th:field="*{toBirthYear}" th:errorclass="fieldError"/>年
                    <select th:field="*{toBirthMonth}" th:errorclass="fieldError"
                            th:classappend="${#fields.hasErrors('toBirthYear')} ? 'fieldError'">
                        <option value=""></option>
                        <option th:each="item : *{getMonthItems()}"
                                th:value="${item.key}" th:text="${item.value}"/>
                    </select>月
                    <select th:field="*{toBirthDay}" th:errorclass="fieldError"
                            th:classappend="${#fields.hasErrors('toBirthYear')} ? 'fieldError'">
                        <option value=""></option>
                        <option th:each="item : *{getDayItems()}"
                                th:value="${item.key}" th:text="${item.value}"/>
                    </select>日
                </td>
            </tr>
            <tr>
                <th>性別</th>
                <td>
                    <select th:field="*{searchSex}">
                        <option value=""></option>
                        <option th:each="item : *{getSexItems()}"
                                th:value="${item.key}" th:text="${item.value}"/>
                    </select>
                </td>
            </tr>
        </table>
        <br/><br/>
        <input type="submit" value="検索" />
    </form>
    <br/>
    <form method="post" th:action="@{/logout}">
        <button type="submit">ログアウト</button>
    </form>
</body>
</html>
「閉じる」ボタンを「ログアウト」ボタンに変更し、「<form method=”post” th:action=”@{/logout}”>」とth:action属性を利用することにより、独自メソッドでなく、Spring Securityに備わっているログアウト処理が実行されるようになっている。
また、ログイン画面を追加している。さらに、cssファイルのパス変更を受け、CSSファイルを読み込むパスをCSSフォルダ下に変更している。その他のHTMLファイルも、同じような変更を行っている。

application.ymlの内容は以下の通りで、「spring.security.user.name」のユーザー名、「spring.security.user.password」のパスワードを削除している。
server:
  port: 8084
spring:
  # DB接続情報
  datasource:
    url: jdbc:oracle:thin:@localhost:1521:xe
    username: USER01
    password: USER01
    driverClassName: oracle.jdbc.driver.OracleDriver
# 一覧画面で1ページに表示する行数
demo:
  list:
    pageSize: 2
その他のソースコード内容は、以下のサイトを参照のこと。
https://github.com/purin-it/java/tree/master/spring-boot-security-original-login/demo
サンプルプログラムの実行結果
サンプルプログラムの実行結果は、以下の通り。
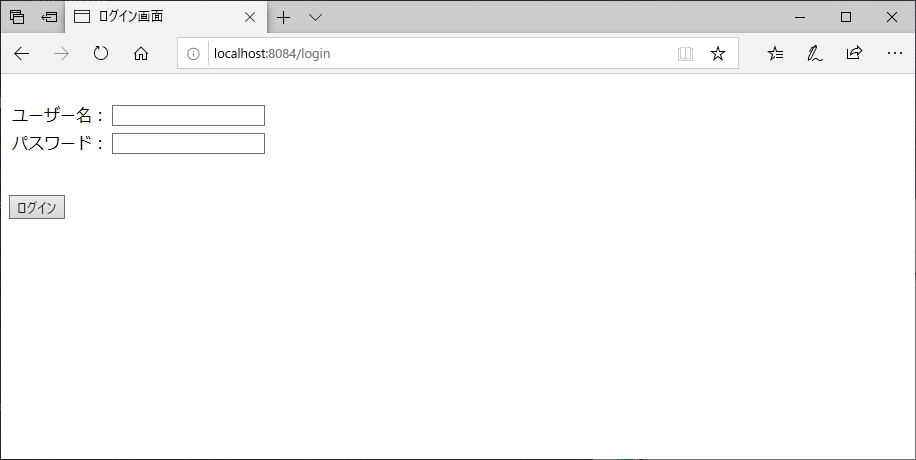
1) Spring Bootアプリケーションを起動し、「http:// (ホスト名):(ポート番号)」とアクセスすると、以下のログイン画面が表示される
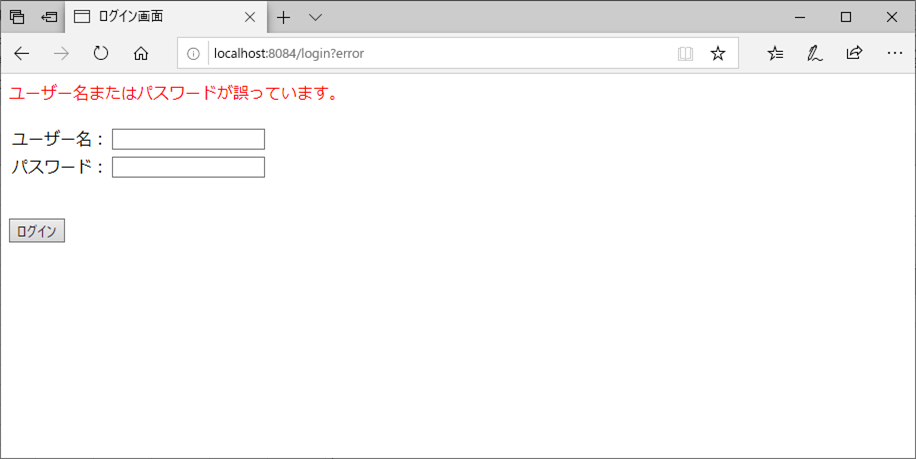
2) DemoSecurityConfig.javaに定義したユーザーと違うユーザー名またはパスワードを入力し、「ログイン」ボタンを押下

3) 以下のように、ログインができず、ログイン画面にエラーメッセージが表示される
4) DemoSecurityConfig.javaに定義したユーザー同じユーザー名・パスワードを入力し、「ログイン」ボタンを押下
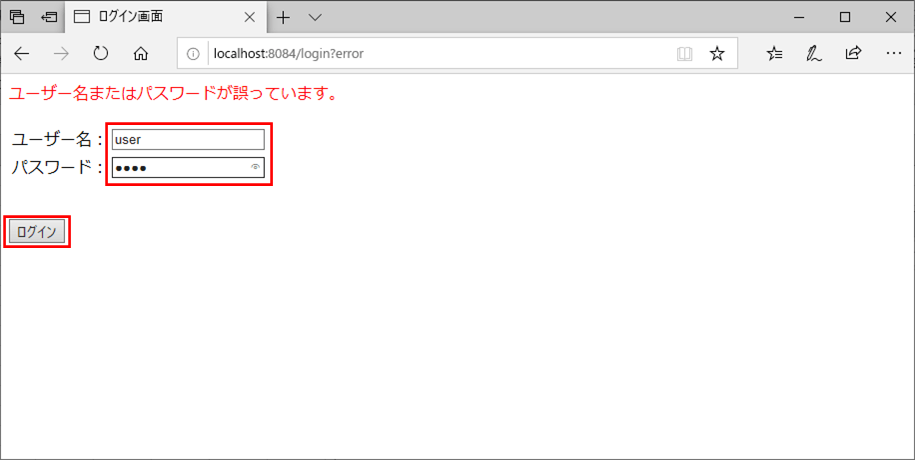
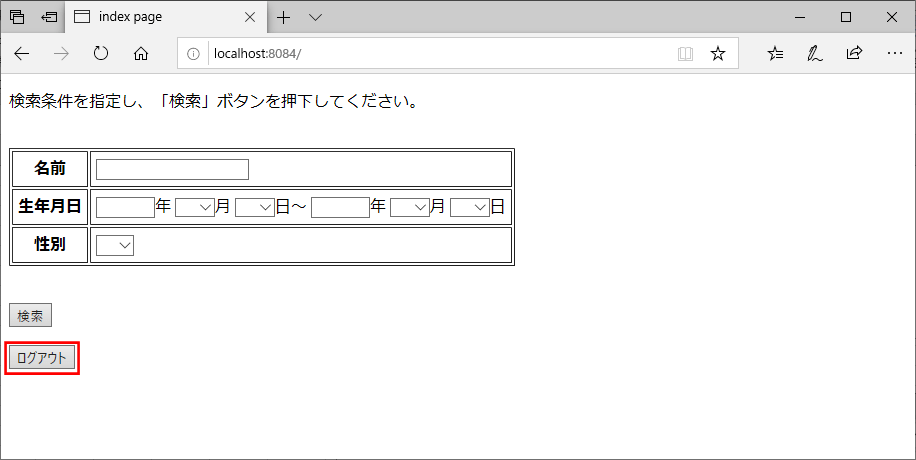
5) 以下のように、ログインでき、検索画面が表示されることが確認できるので、「ログアウト」ボタンを押下
6) 以下のように、ログイン画面に遷移することが確認できる

要点まとめ
- WebSecurityConfigurerAdapterクラスを継承したクラス内で、ログイン・ログアウトの認証設定やユーザー・パスワードの格納処理を定義できる。
- formタグ内で「th:action=”@{/login}”」「th:action=”@{/output}”」を指定することで、Spring Securityに備わっているログイン/ログアウト処理を実行することができる。この場合、POSTメソッドを利用する必要がある。