Microsoft Foundry上で音声合成と音声認識のサービスを利用してみた
Microsoft Foundryには様々なサービスが用意されていて、その中には音声サービスがいくつか含まれている。
今回は、Microsoft Foundryの音声合成(Azure Speech – テキスト読み上げ)サービスと音声認識(Azure Speech – 音声テキスト変換)サービスを利用してみたので、その手順を共有する。
なお、入力した文字データや文章(テキスト)を基に、人間が話しているような音声をコンピュータで人工的に作り出す技術を音声合成といい、音声をコンピューターが解析し、テキスト(文字)に変換する技術を音声認識という。
前提条件
下記記事の「Microsoft Foundryへのログインとプロジェクト作成」が完了していること。

やってみたこと
音声合成サービスの実行と呼び出し
Microsoft Foundry上の音声合成(Azure Speech – テキスト読み上げ)サービスは、デプロイしなくても画面から実行できる。また、APIキーを指定してAPIで呼び出すことができる。その手順は、以下の通り。
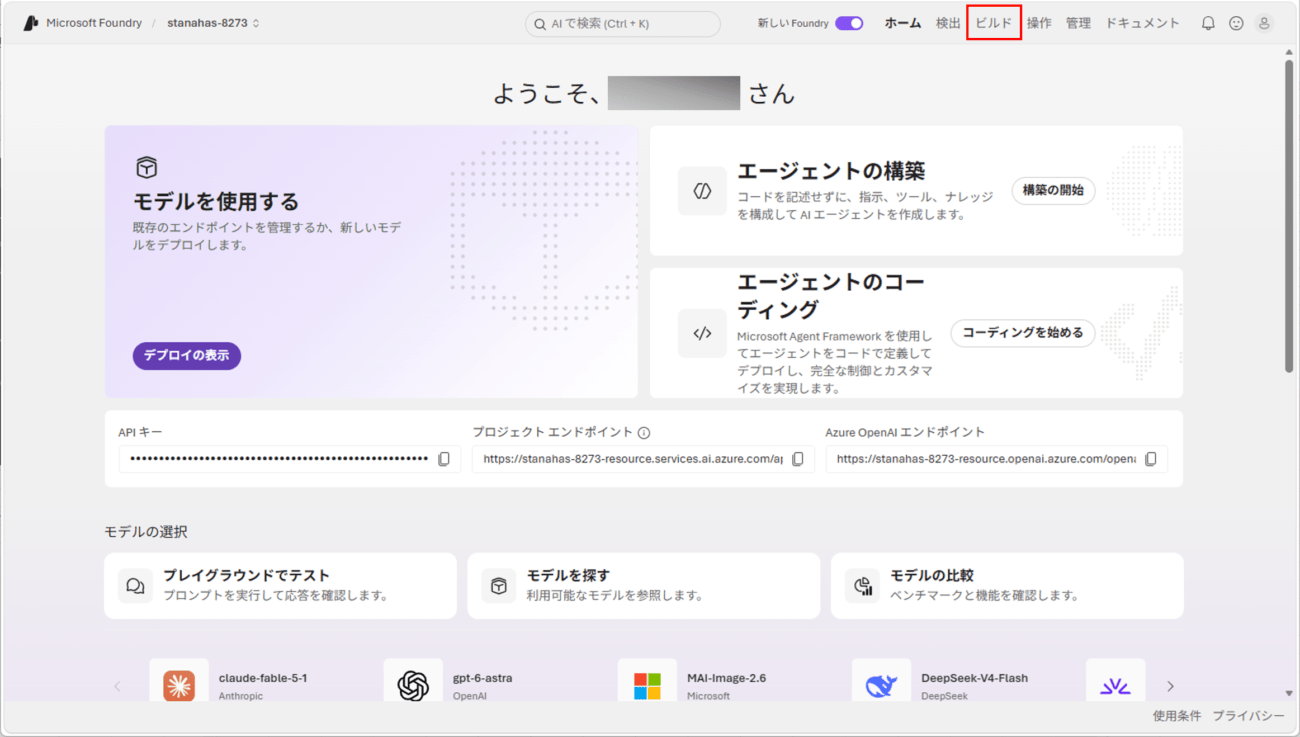
1) Microsoft Foundryにログインし、「ビルド」メニューを押下する。
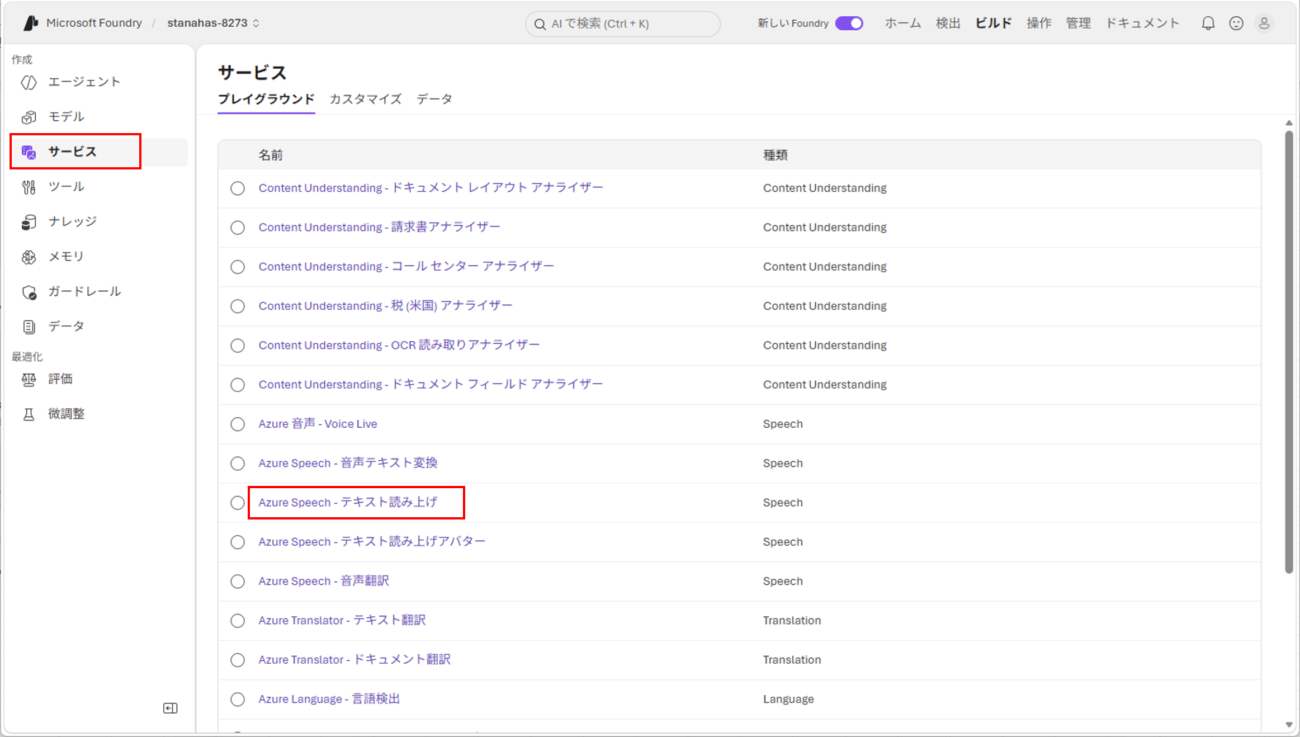
2)「サービス」メニューを押下後、「Azure Speech – テキスト読み上げ」メニューを押下する。
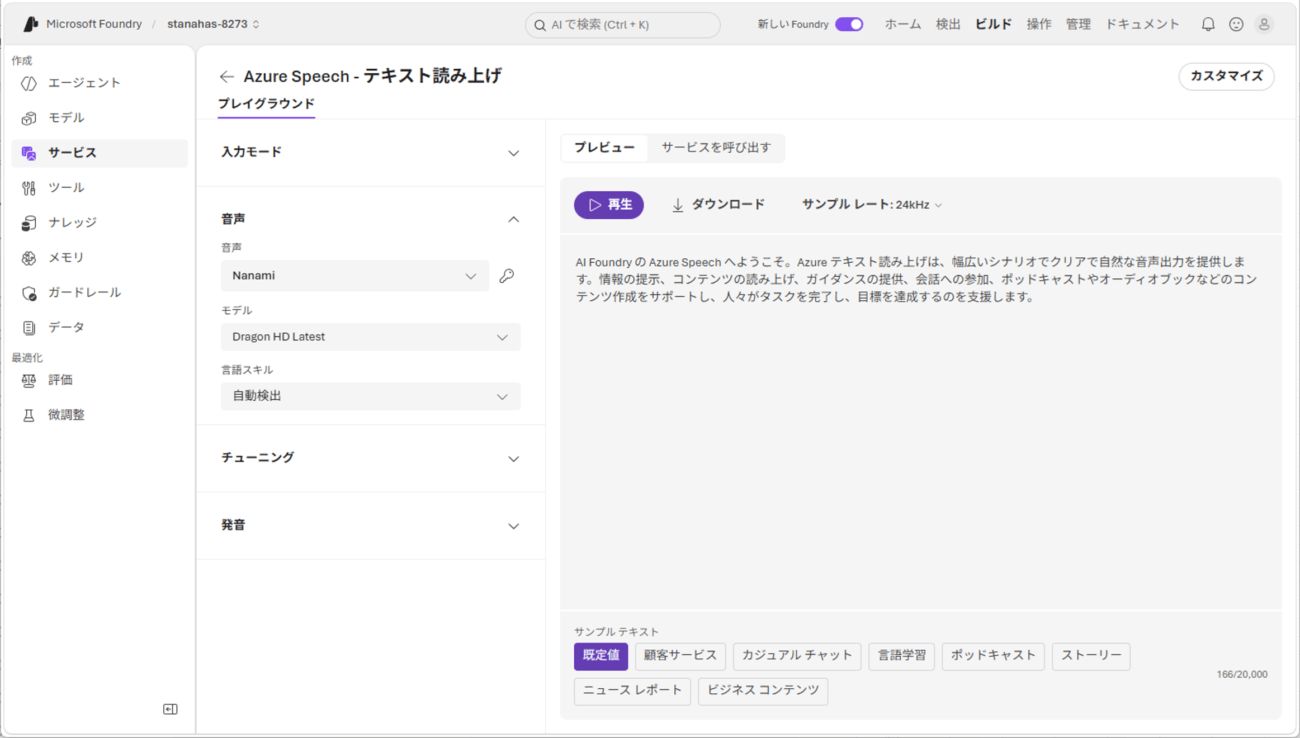
3) 以下のように、選択したメニューの画面が表示されることが確認できる。
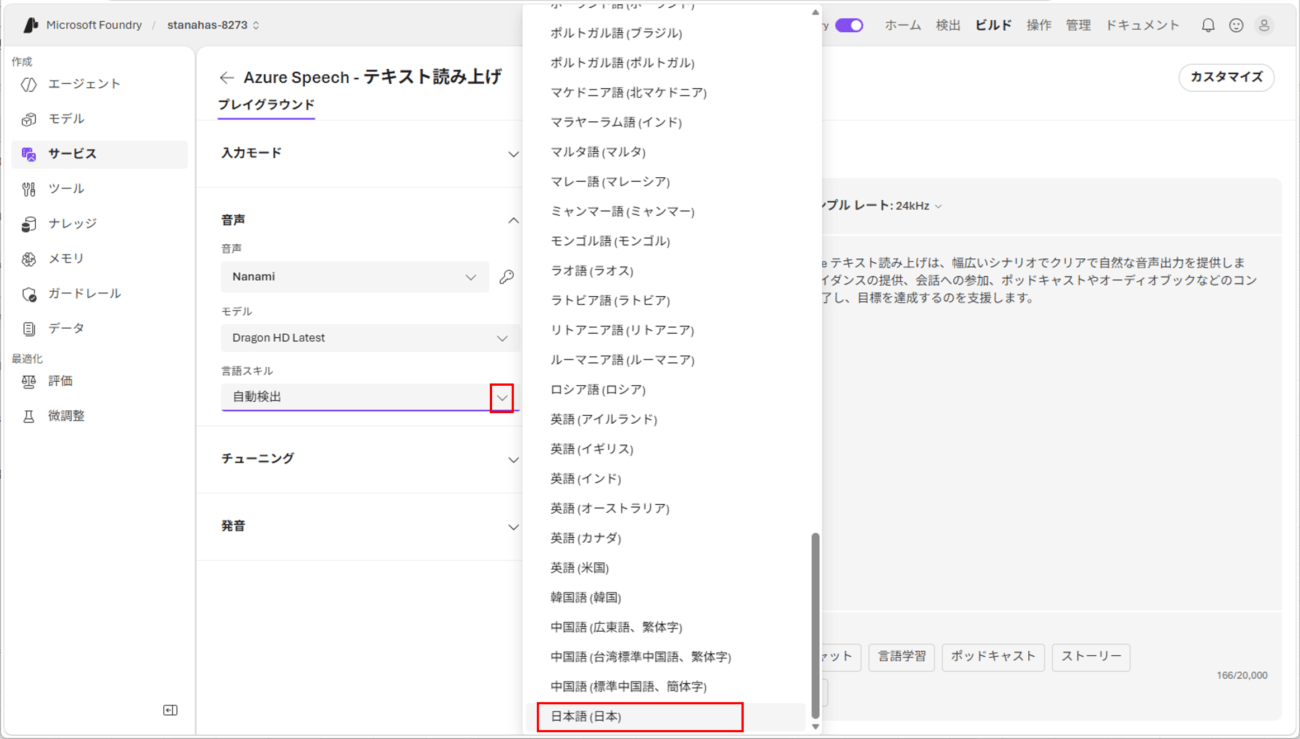
4) 言語スキルが「自動検出」になっているため、「日本語(日本)」を選択する。
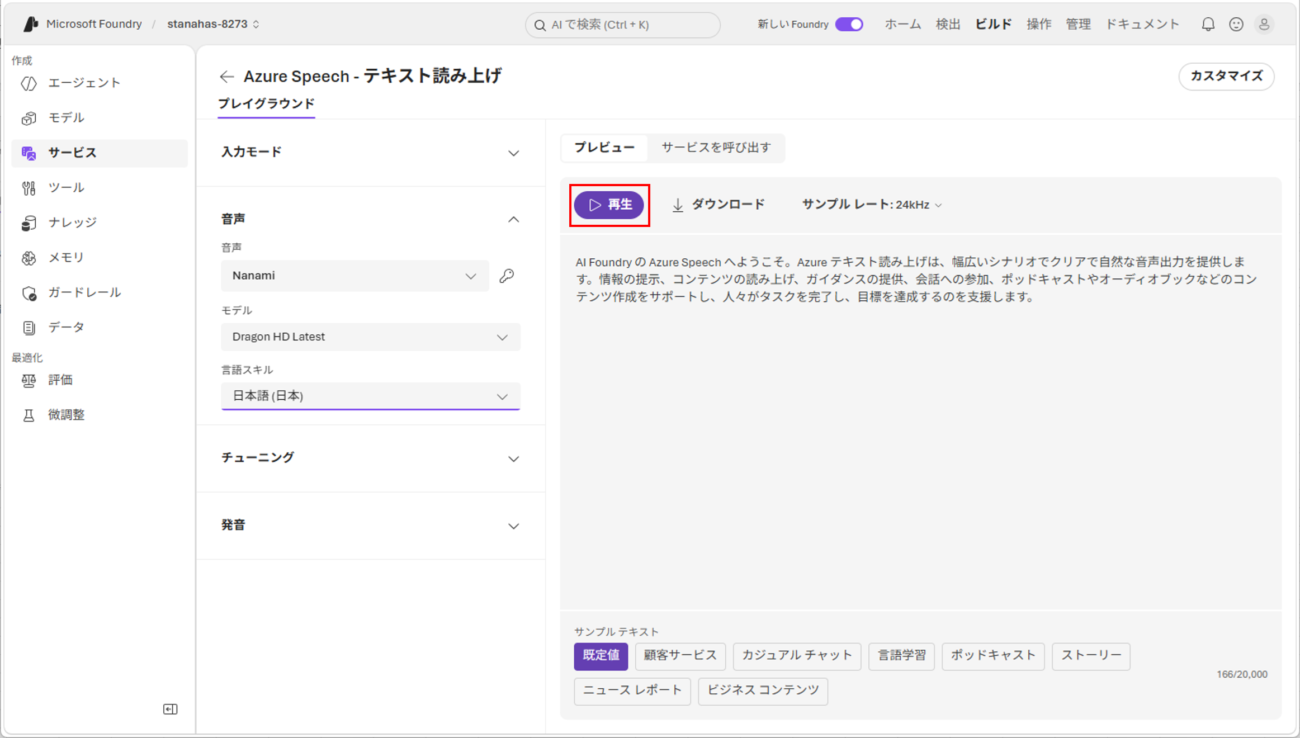
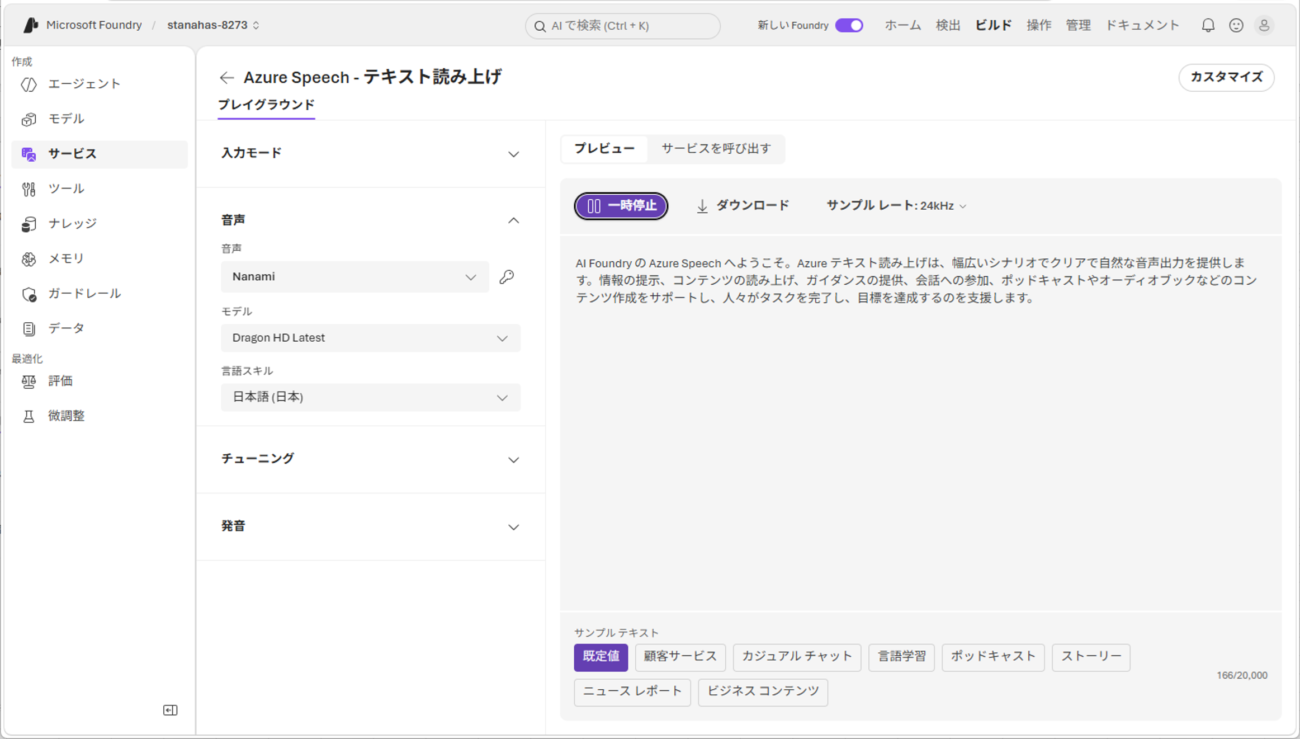
5) 以下の状態で「再生」ボタンを押下すると、「プレビュー」欄に表示されている文言が再生されるのが確認できる。
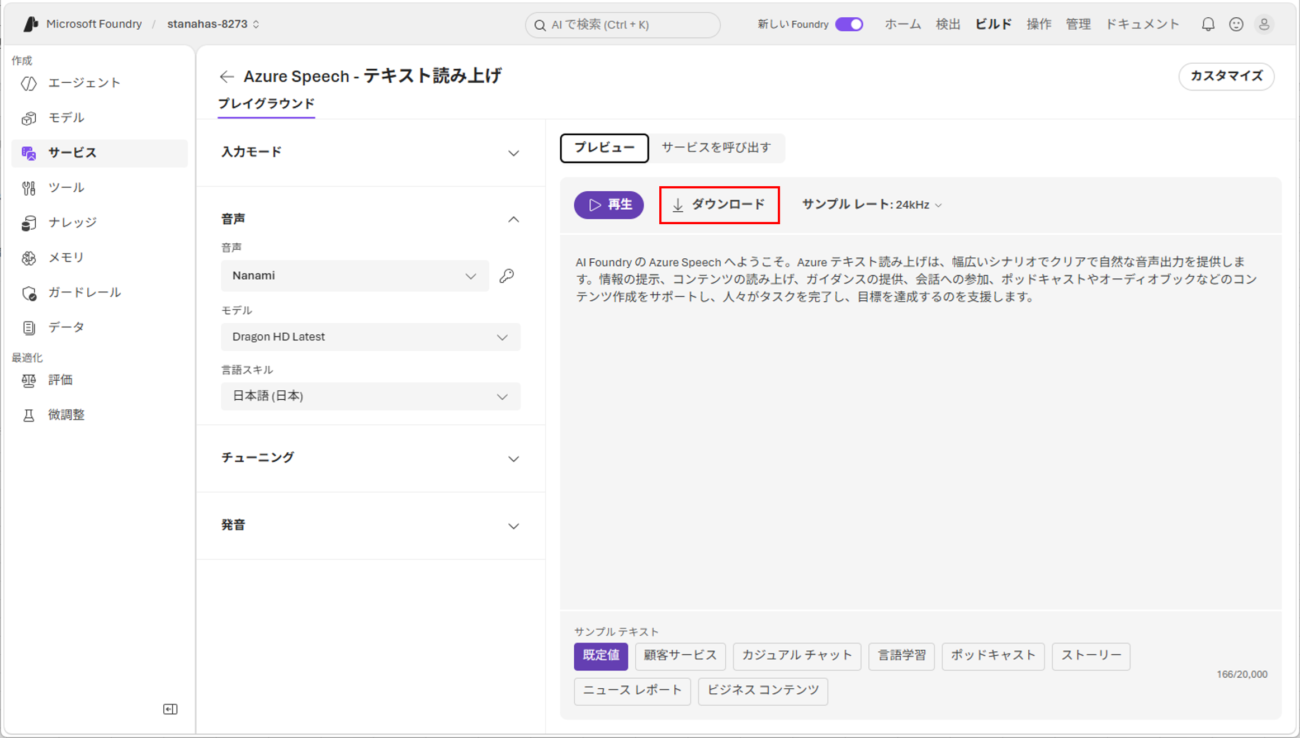
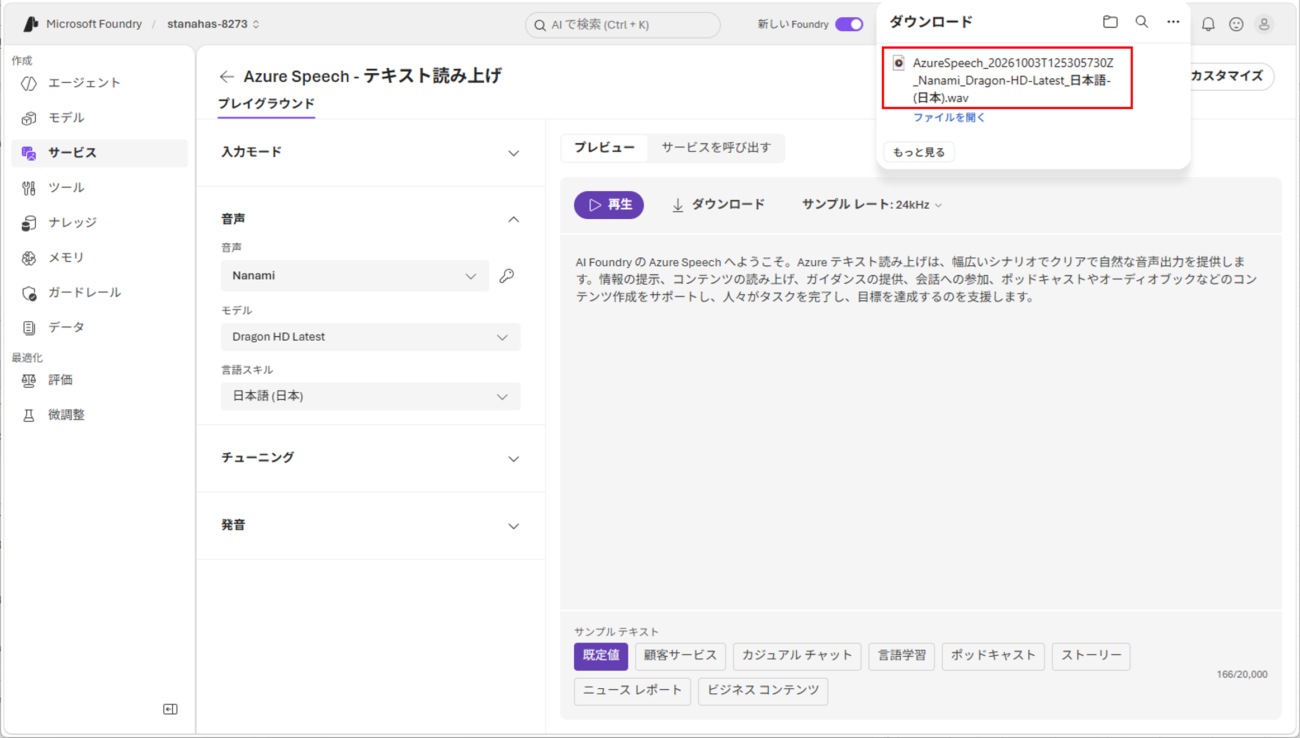
6) 以下の状態で「ダウンロード」ボタンを押下すると、再生された音声ファイルがダウンロードされるのが確認できる。
7)「サービスを呼び出す」を押下すると、今回試した音声合成のプログラムが表示されるのが確認できるため、表示されたソースコードをコピーする。
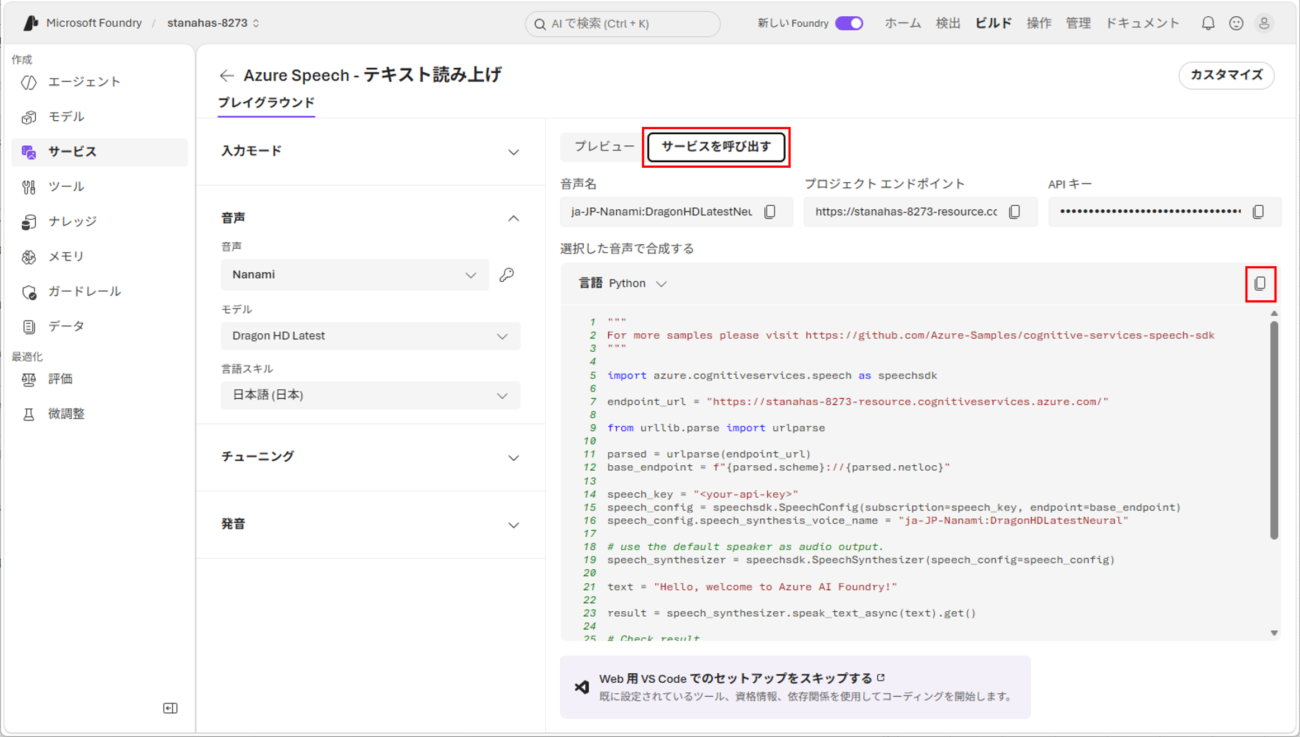
8) 7)でコピーしたソースコードは、以下の通り。
"""
For more samples please visit https://github.com/Azure-Samples/cognitive-services-speech-sdk
"""

import azure.cognitiveservices.speech as speechsdk

endpoint_url = "https://stanahas-8273-resource.cognitiveservices.azure.com/"

from urllib.parse import urlparse

parsed = urlparse(endpoint_url)
base_endpoint = f"{parsed.scheme}://{parsed.netloc}"

speech_key = "<your-api-key>"
speech_config = speechsdk.SpeechConfig(subscription=speech_key, endpoint=base_endpoint)
speech_config.speech_synthesis_voice_name = "ja-JP-Nanami:DragonHDLatestNeural"

# use the default speaker as audio output.
speech_synthesizer = speechsdk.SpeechSynthesizer(speech_config=speech_config)

text = "Hello, welcome to Azure AI Foundry!"

result = speech_synthesizer.speak_text_async(text).get()

# Check result
if result.reason == speechsdk.ResultReason.SynthesizingAudioCompleted:
    print("Speech synthesized for text [{}]".format(text))
elif result.reason == speechsdk.ResultReason.Canceled:
    cancellation_details = result.cancellation_details
    print("Speech synthesis canceled: {}".format(cancellation_details.reason))
    if cancellation_details.reason == speechsdk.CancellationReason.Error:
        print("Error details: {}".format(cancellation_details.error_details))
9) 8)の内容を、ローカル端末上のソースコード「call_text_to_speech.py」に貼り付ける。
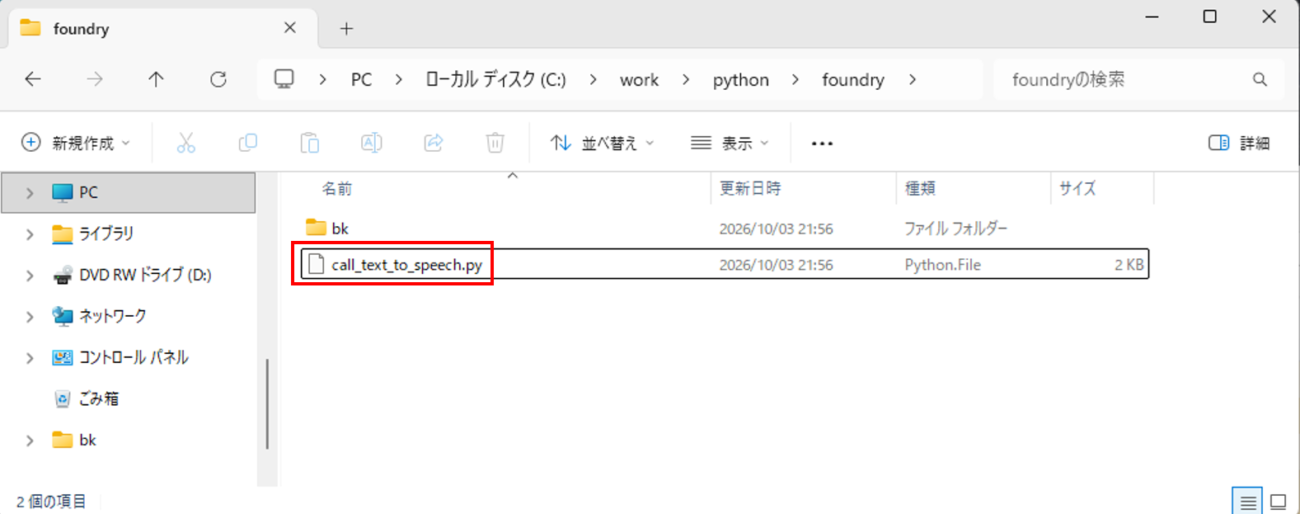
10) 9)で貼り付けたソースコードを以下のように変更し、文字コードをUTF-8にした状態で貼り付ける。
"""
For more samples please visit https://github.com/Azure-Samples/cognitive-services-speech-sdk
"""

import azure.cognitiveservices.speech as speechsdk

endpoint_url = "https://stanahas-8273-resource.cognitiveservices.azure.com/"

from urllib.parse import urlparse

parsed = urlparse(endpoint_url)
base_endpoint = f"{parsed.scheme}://{parsed.netloc}"

speech_key = "<your-api-key>"
speech_config = speechsdk.SpeechConfig(subscription=speech_key, endpoint=base_endpoint)
speech_config.speech_synthesis_voice_name = "ja-JP-Nanami:DragonHDLatestNeural"

# use the default speaker as audio output.
speech_synthesizer = speechsdk.SpeechSynthesizer(speech_config=speech_config)

text = (
    "AI Foundry の Azure Speech へようこそ。"
    "Azure テキスト読み上げは、幅広いシナリオでクリアで自然な音声出力を提供します。"
    "情報の提示、コンテンツの読み上げ、ガイダンスの提供、会話への参加、ポッドキャストや"
    "オーディオブックなどのコンテンツ作成をサポートし、人々がタスクを完了し、目標を達成するのを支援します。"
)

# 合成済の音声を表示
result = speech_synthesizer.speak_text_async(text).get()

# 合成済の音声をAzureSpeech.wavファイルに保存
stream = speechsdk.AudioDataStream(result)
stream.save_to_wav_file("AzureSpeech.wav")

# Check result
if result.reason == speechsdk.ResultReason.SynthesizingAudioCompleted:
    print("Speech synthesized for text [{}]".format(text))
elif result.reason == speechsdk.ResultReason.Canceled:
    cancellation_details = result.cancellation_details
    print("Speech synthesis canceled: {}".format(cancellation_details.reason))
    if cancellation_details.reason == speechsdk.CancellationReason.Error:
        print("Error details: {}".format(cancellation_details.error_details))
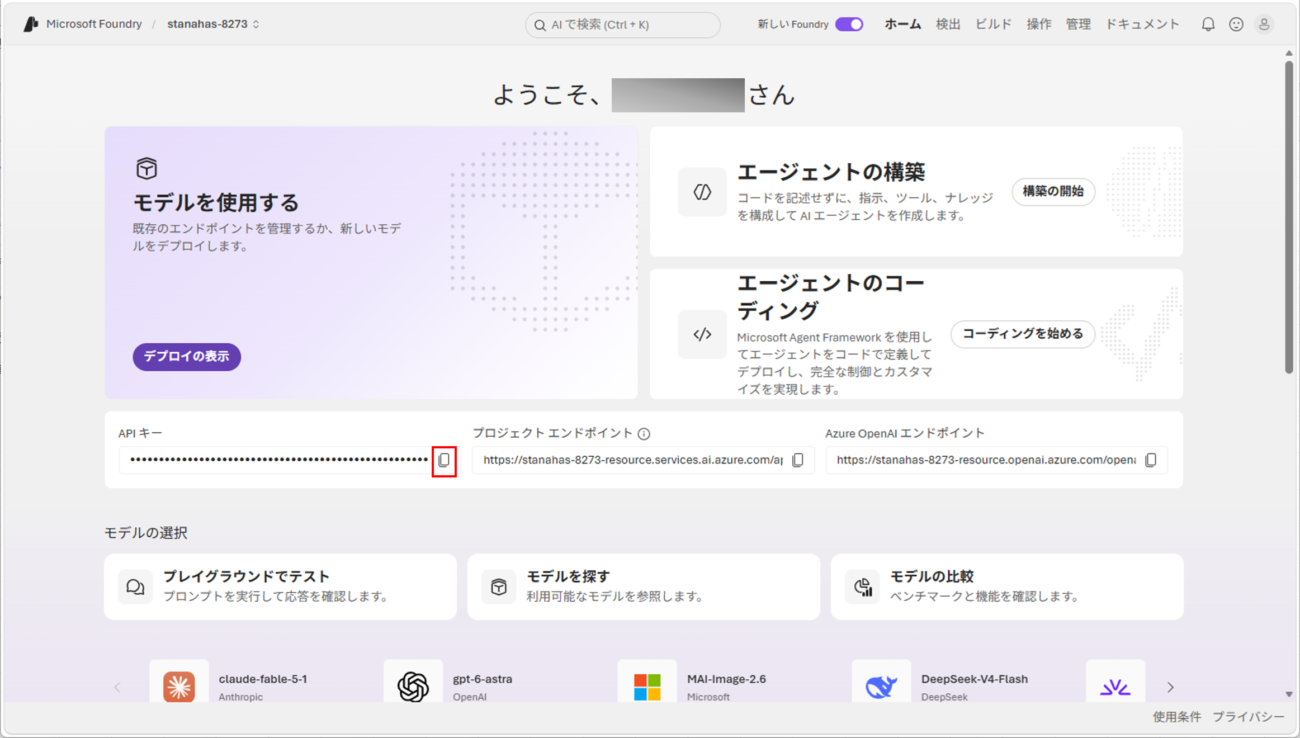
11) APIキーはMicrosoft Foundryのホーム画面からコピーし、先ほどのPythonソースコード「call_text_pii.py」の「<your-api-key>」部分に貼り付ける。
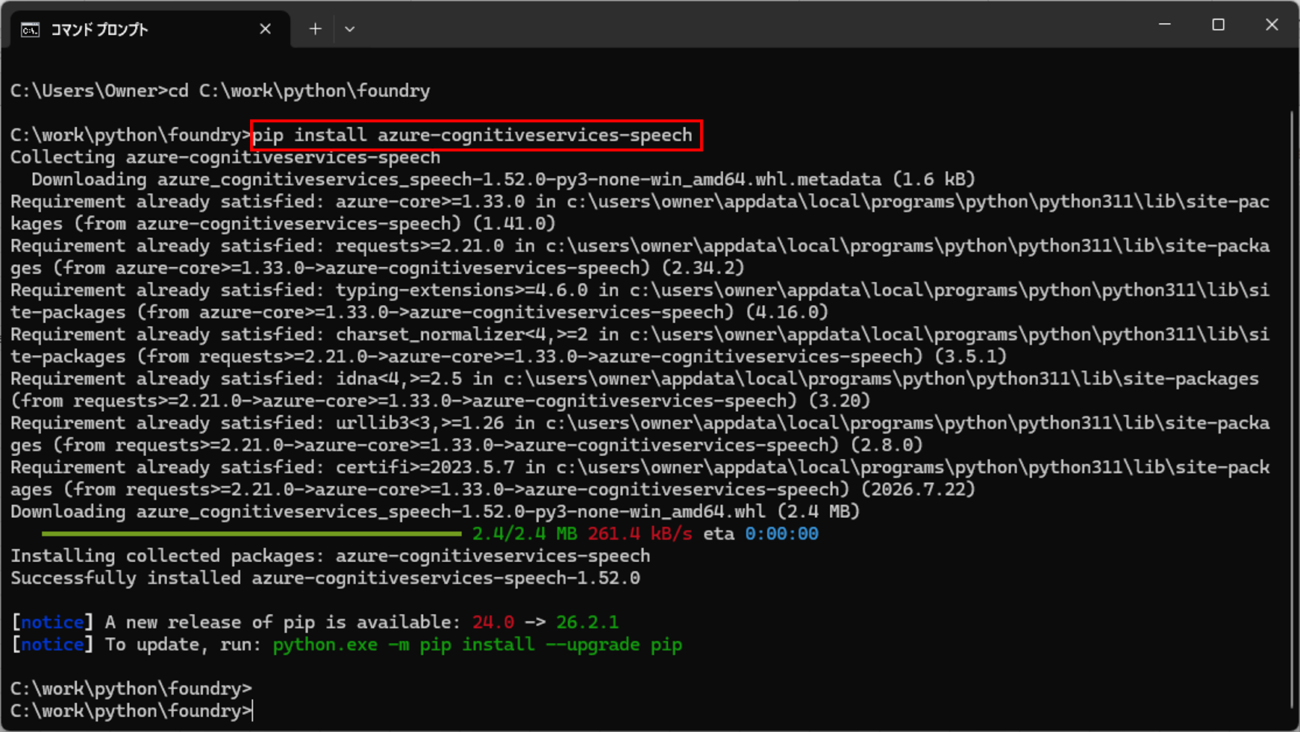
12) 10)のプログラムを実行する際、音声サービス用のライブラリが必要なので、「pip install azure-cognitiveservices-speech」コマンドを実行しインストールする。
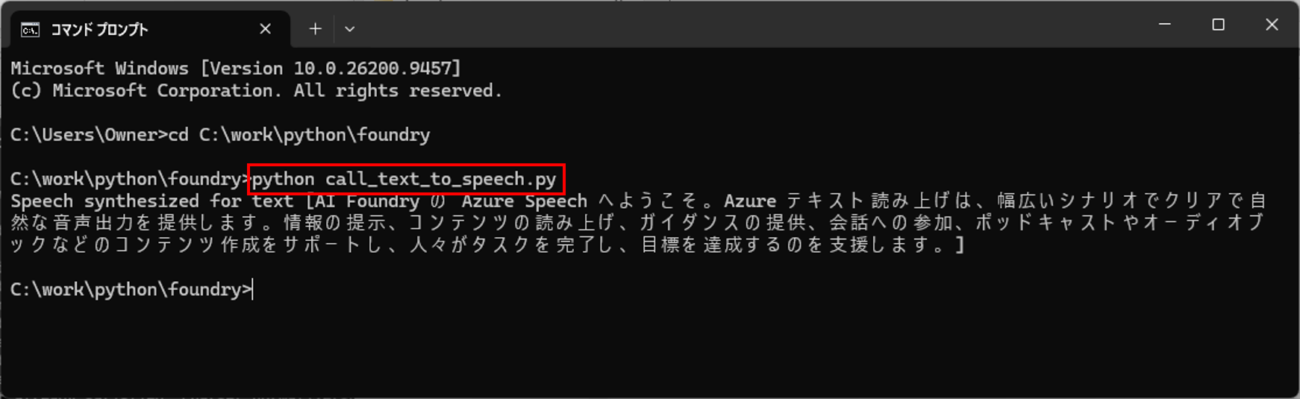
13)「call_text_to_speech.py」を実行した結果は以下の通りで、textに渡したテキストが音声として再生され、音声ファイル(AzureSpeech.wav)が出力されているのが確認できる。
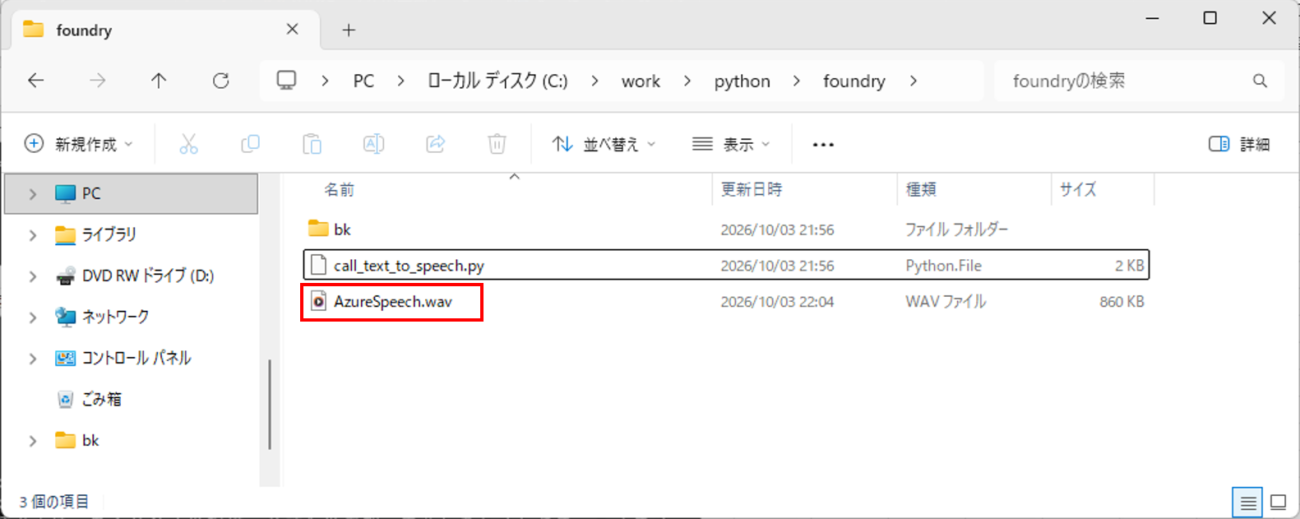
なお、出力された「AzureSpeech.wav」の内容は、以下の通り。
※音が出るのでご注意ください。

音声認識サービスの実行と呼び出し
Microsoft Foundry上の音声認識(Azure Speech – 音声テキスト変換)サービスは、デプロイしなくても画面から実行できる。また、APIキーを指定してAPIで呼び出すことができる。その手順は、以下の通り。
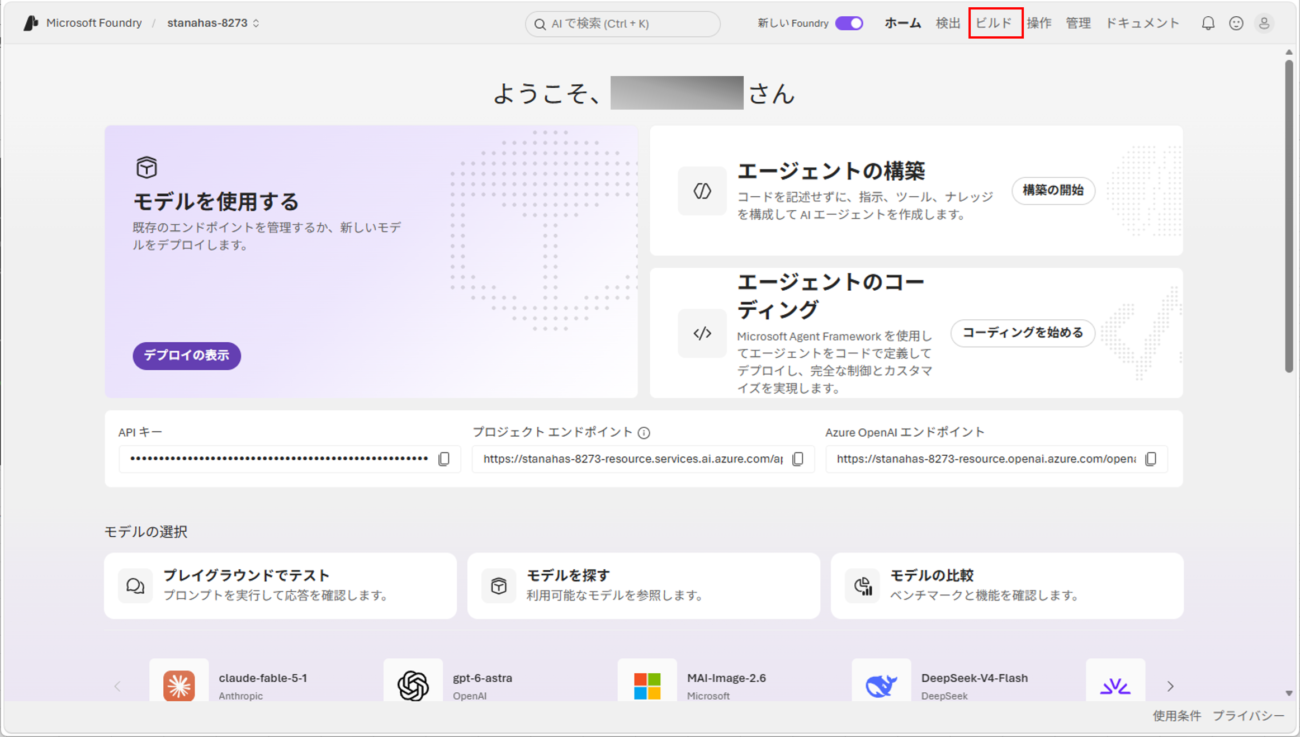
1) Microsoft Foundryにログインし、「ビルド」メニューを押下する。
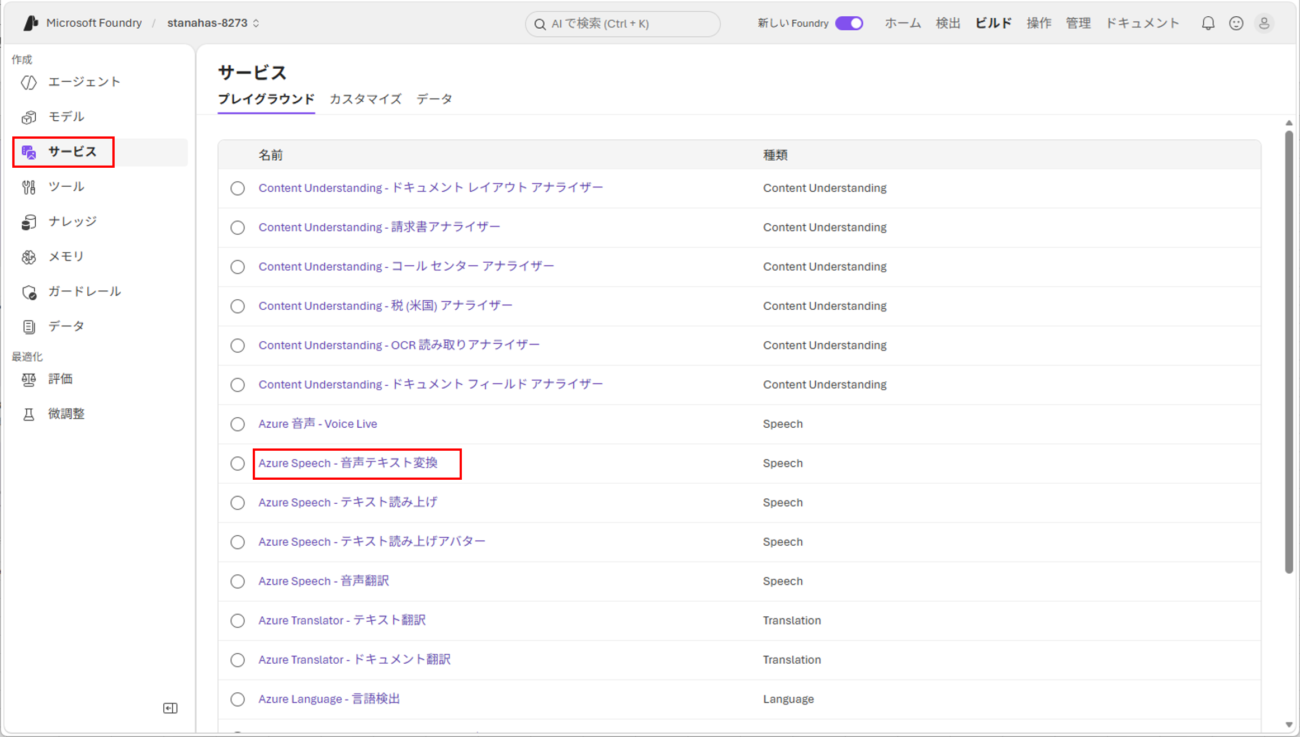
2)「サービス」メニューを押下後、「Azure Speech – 音声テキスト変換」メニューを押下する。
3) 以下のように、選択したメニューの画面が表示されることが確認できる。
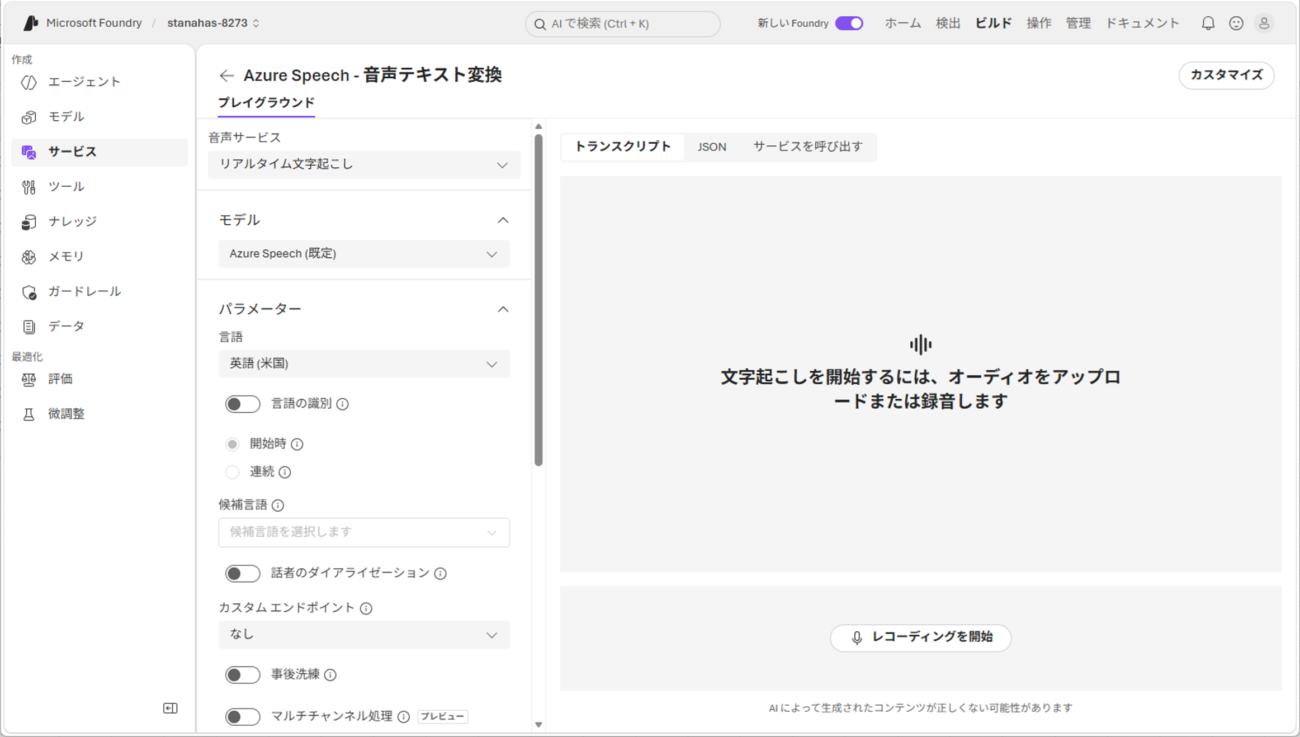
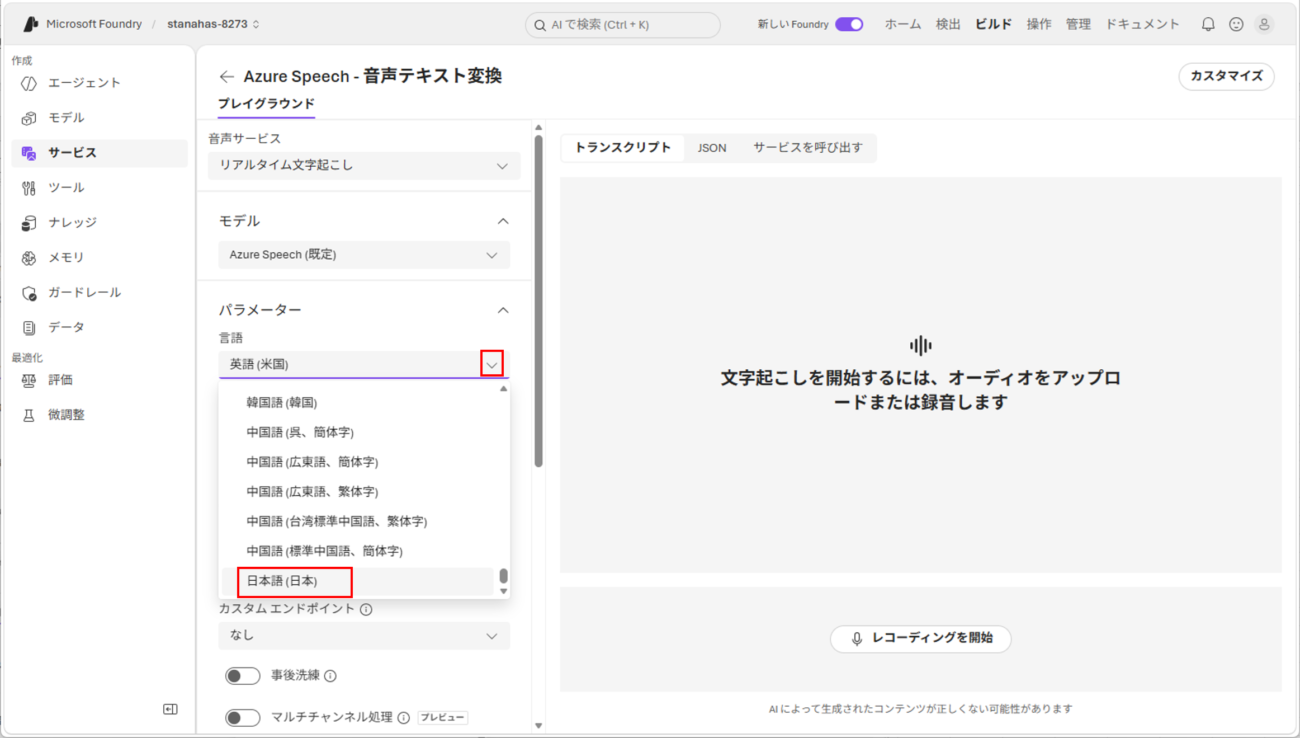
4) 言語スキルが「英語(米国)」になっているため、「日本語(日本)」を選択する。
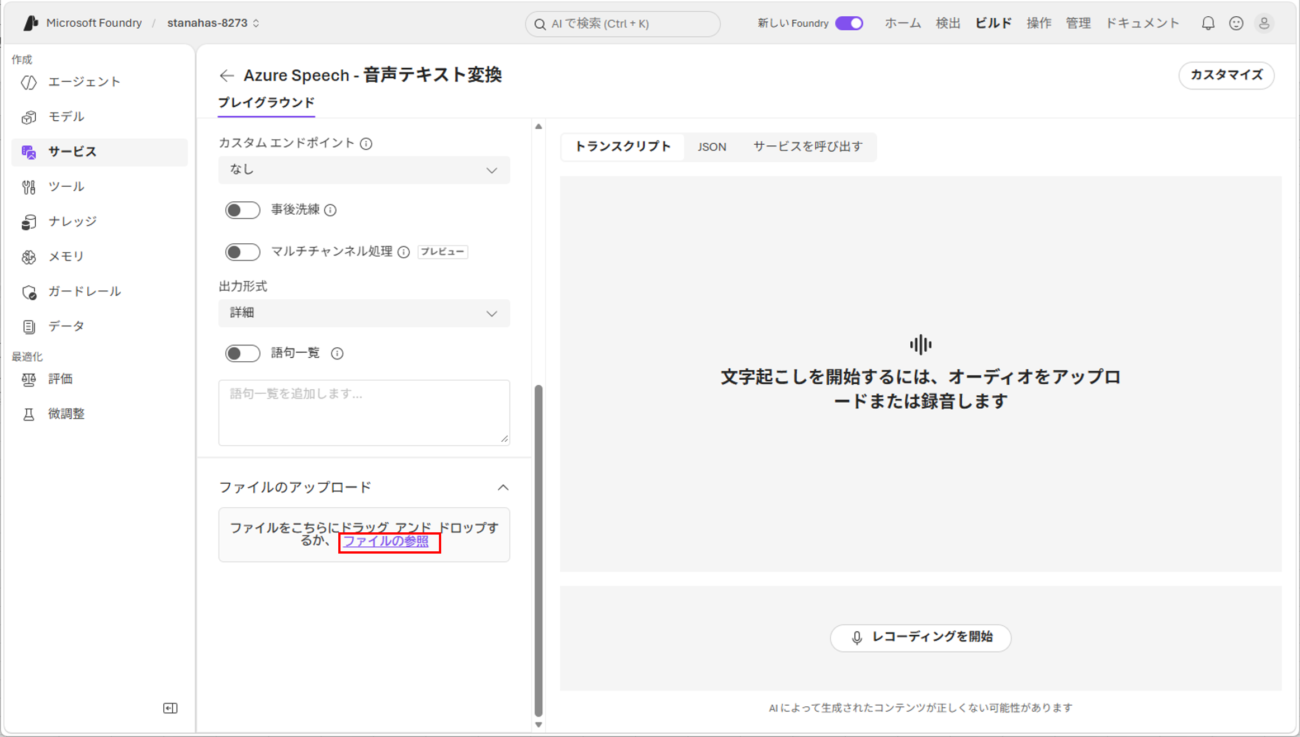
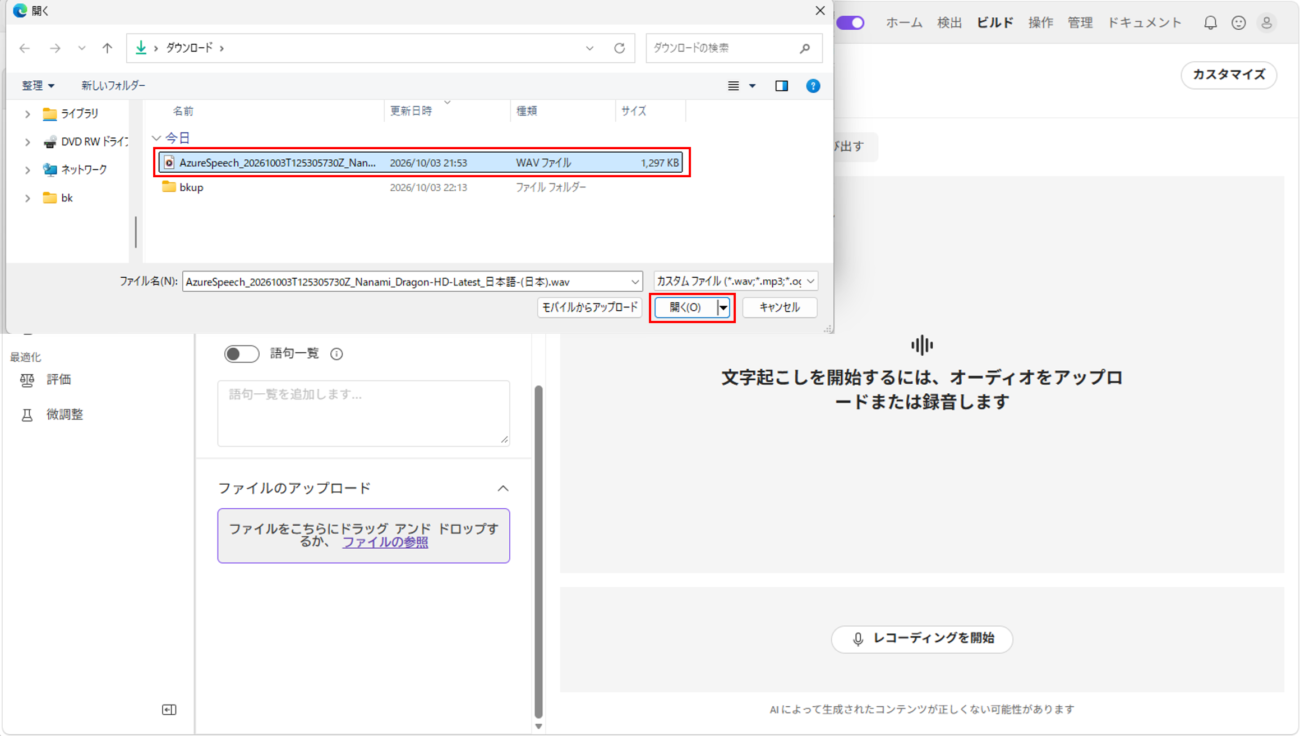
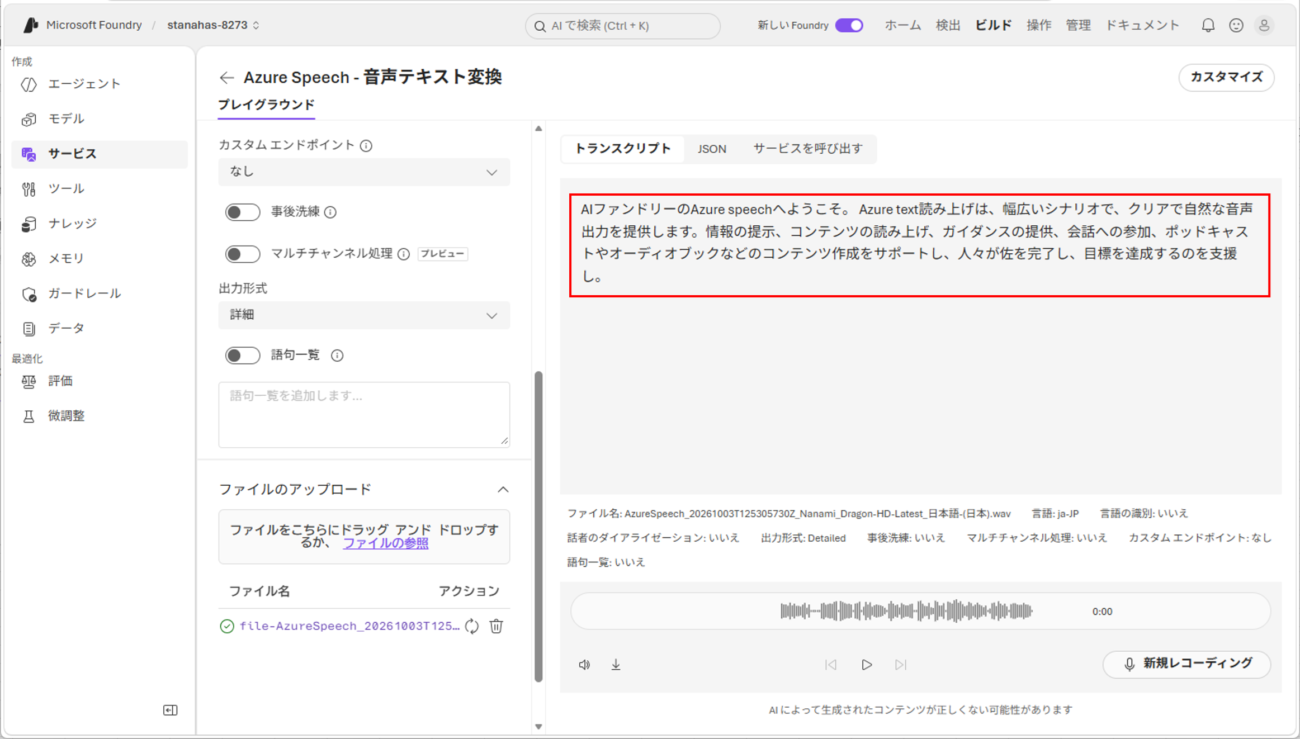
5) ファイルのアップロードから「ファイルの参照」を押下し、先ほど音声合成でダウンロードしたファイルを指定すると、「トランスクリプト」欄に、読み込んだ音声ファイルの内容をテキスト表示するのが確認できる。
6)「サービスを呼び出す」を押下すると、今回試した音声合成のプログラムが表示されるのが確認できるため、表示されたソースコードをコピーする。
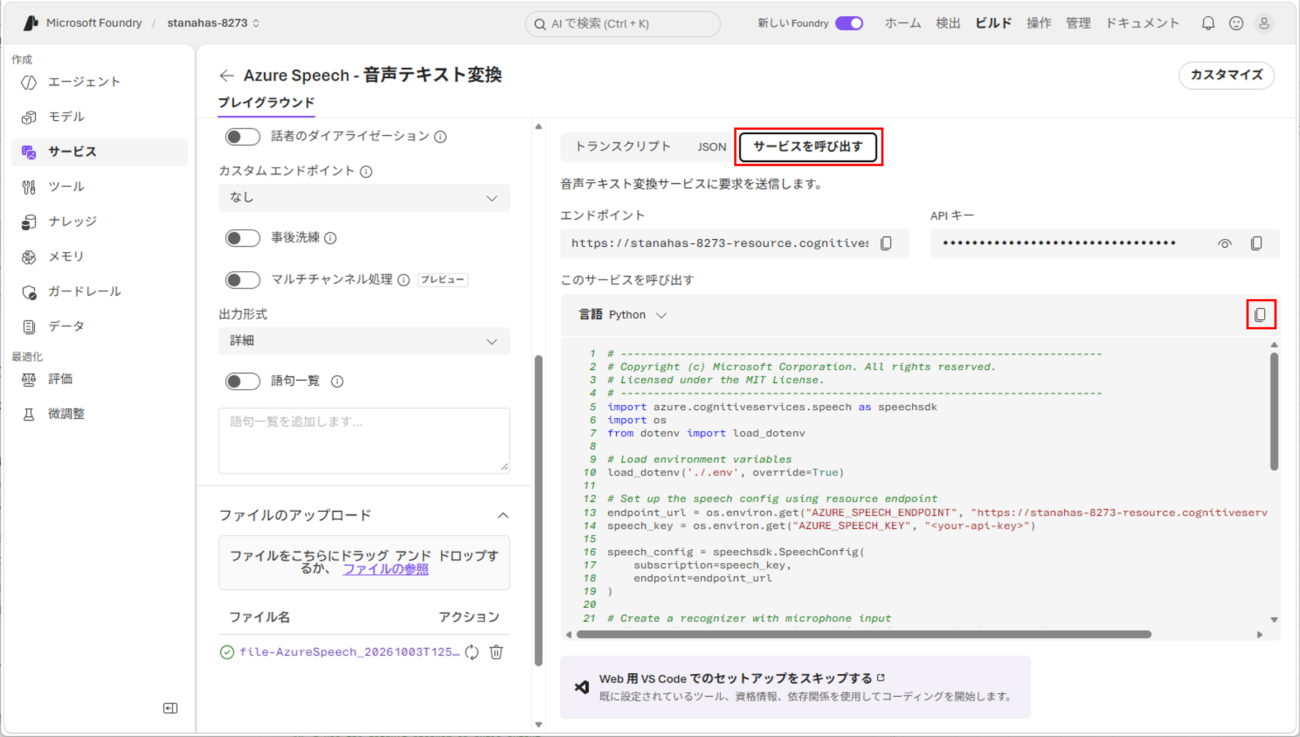
7) 6)でコピーしたソースコードは、以下の通り。
# -------------------------------------------------------------------------
# Copyright (c) Microsoft Corporation. All rights reserved.
# Licensed under the MIT License.
# -------------------------------------------------------------------------
import azure.cognitiveservices.speech as speechsdk
import os
from dotenv import load_dotenv

# Load environment variables
load_dotenv('./.env', override=True)

# Set up the speech config using resource endpoint
endpoint_url = os.environ.get("AZURE_SPEECH_ENDPOINT", "https://stanahas-8273-resource.cognitiveservices.azure.com/")
speech_key = os.environ.get("AZURE_SPEECH_KEY", "<your-api-key>")

speech_config = speechsdk.SpeechConfig(
    subscription=speech_key,
    endpoint=endpoint_url
)

# Create a recognizer with microphone input
audio_config = speechsdk.audio.AudioConfig(use_default_microphone=True)
speech_recognizer = speechsdk.SpeechRecognizer(
    speech_config=speech_config,
    audio_config=audio_config
)

# Event handlers
def recognized_handler(evt):
    print(f"Recognized: {evt.result.text}")

def recognizing_handler(evt):
    print(f"Recognizing: {evt.result.text}")

# Connect event handlers
speech_recognizer.recognized.connect(recognized_handler)
speech_recognizer.recognizing.connect(recognizing_handler)

# Start continuous recognition
speech_recognizer.start_continuous_recognition()
print("Say something...")

# Keep the program running
input("Press Enter to stop...")
speech_recognizer.stop_continuous_recognition()
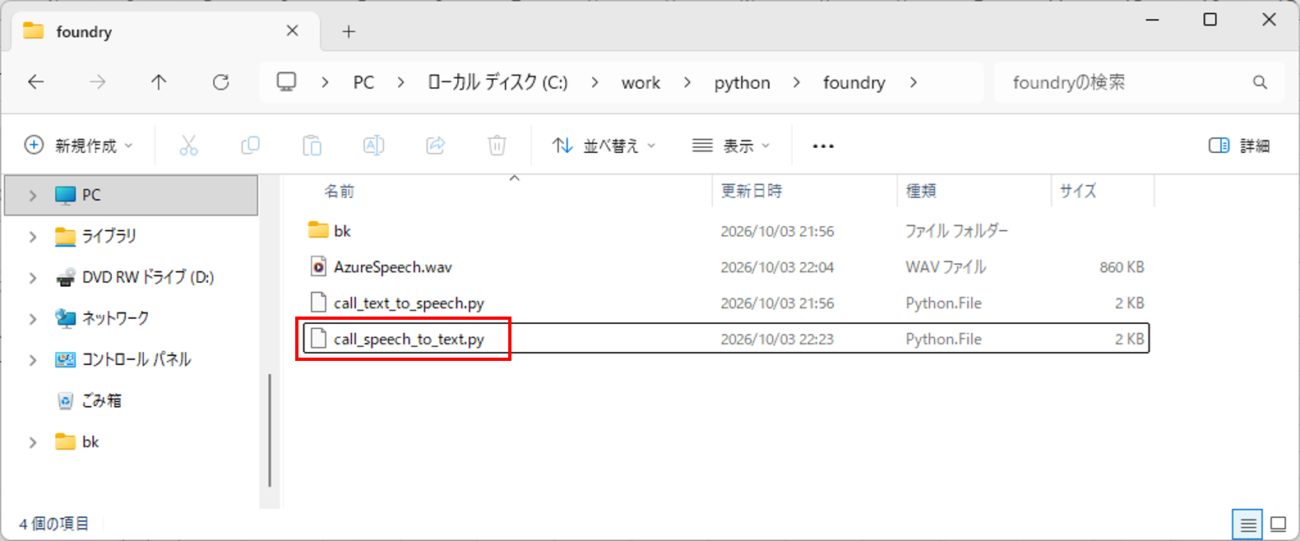
8) 7)の内容を、ローカル端末上のソースコード「call_speech_to_text.py」に貼り付ける。
9) 8)で貼り付けたソースコードを以下のように変更し、文字コードをUTF-8にした状態で貼り付ける。
# -------------------------------------------------------------------------
# Copyright (c) Microsoft Corporation. All rights reserved.
# Licensed under the MIT License.
# -------------------------------------------------------------------------
import azure.cognitiveservices.speech as speechsdk
import os
from dotenv import load_dotenv

# Load environment variables
load_dotenv('./.env', override=True)

# Set up the speech config using resource endpoint
endpoint_url = os.environ.get("AZURE_SPEECH_ENDPOINT", "https://stanahas-8273-resource.cognitiveservices.azure.com/")
speech_key = os.environ.get("AZURE_SPEECH_KEY", "<your-api-key>")

speech_config = speechsdk.SpeechConfig(
    subscription=speech_key,
    endpoint=endpoint_url,
    speech_recognition_language="ja-JP"
)

# Create a recognizer with microphone input
# audio_config = speechsdk.audio.AudioConfig(use_default_microphone=True)
# 音声の取得元をwavファイル(AzureSpeech.wav)に変更する
audio_config = speechsdk.audio.AudioConfig(filename="AzureSpeech.wav")
speech_recognizer = speechsdk.SpeechRecognizer(
    speech_config=speech_config,
    audio_config=audio_config
)

# 音声認識済のテキストを表示
# Event handlers
def recognized_handler(evt):
    print(f"Recognized: {evt.result.text}\r\n")

# 音声認識中のテキストを表示
def recognizing_handler(evt):
    print(f"Recognizing: {evt.result.text}")

# Connect event handlers
speech_recognizer.recognized.connect(recognized_handler)
speech_recognizer.recognizing.connect(recognizing_handler)

# Start continuous recognition
speech_recognizer.start_continuous_recognition()
print("AzureSpeech.wav is loading...")

# Keep the program running
input("Press Enter to stop...\r\n")
speech_recognizer.stop_continuous_recognition()
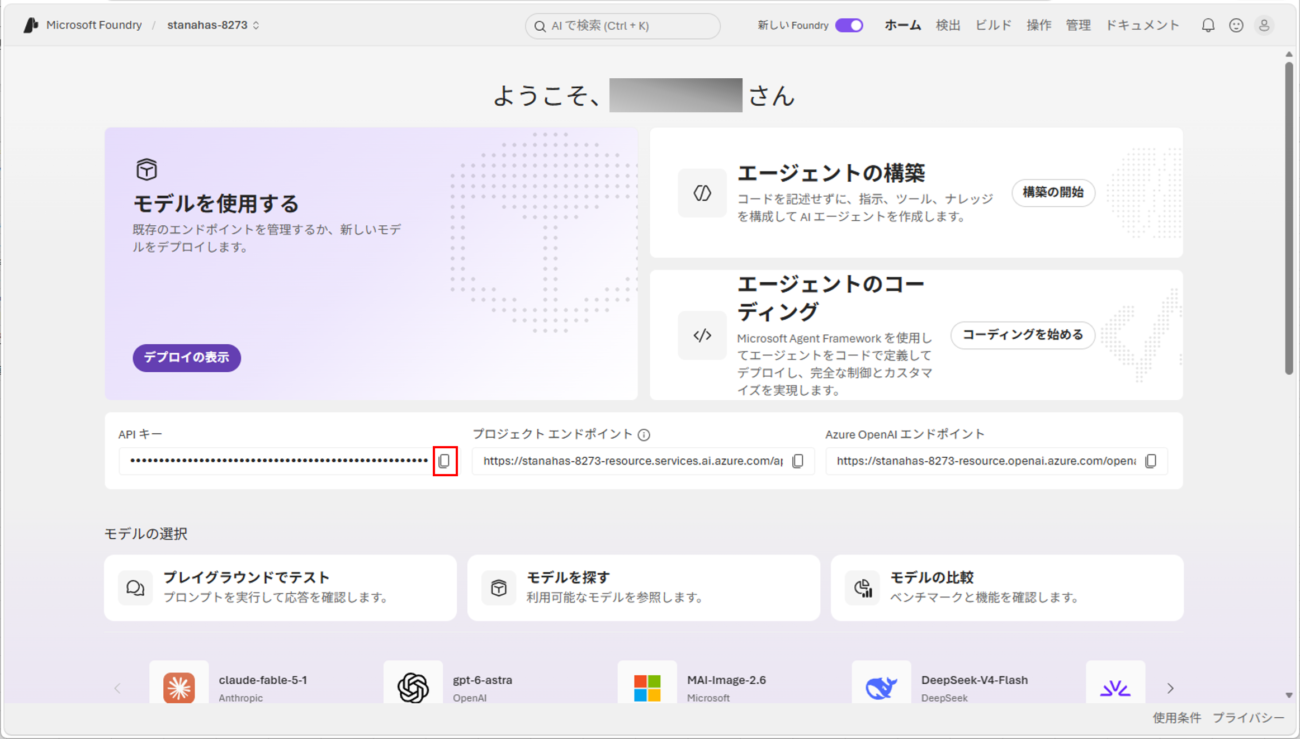
10) APIキーはMicrosoft Foundryのホーム画面からコピーし、先ほどのPythonソースコード「call_speech_to_text.py」の「<your-api-key>」部分に貼り付ける。
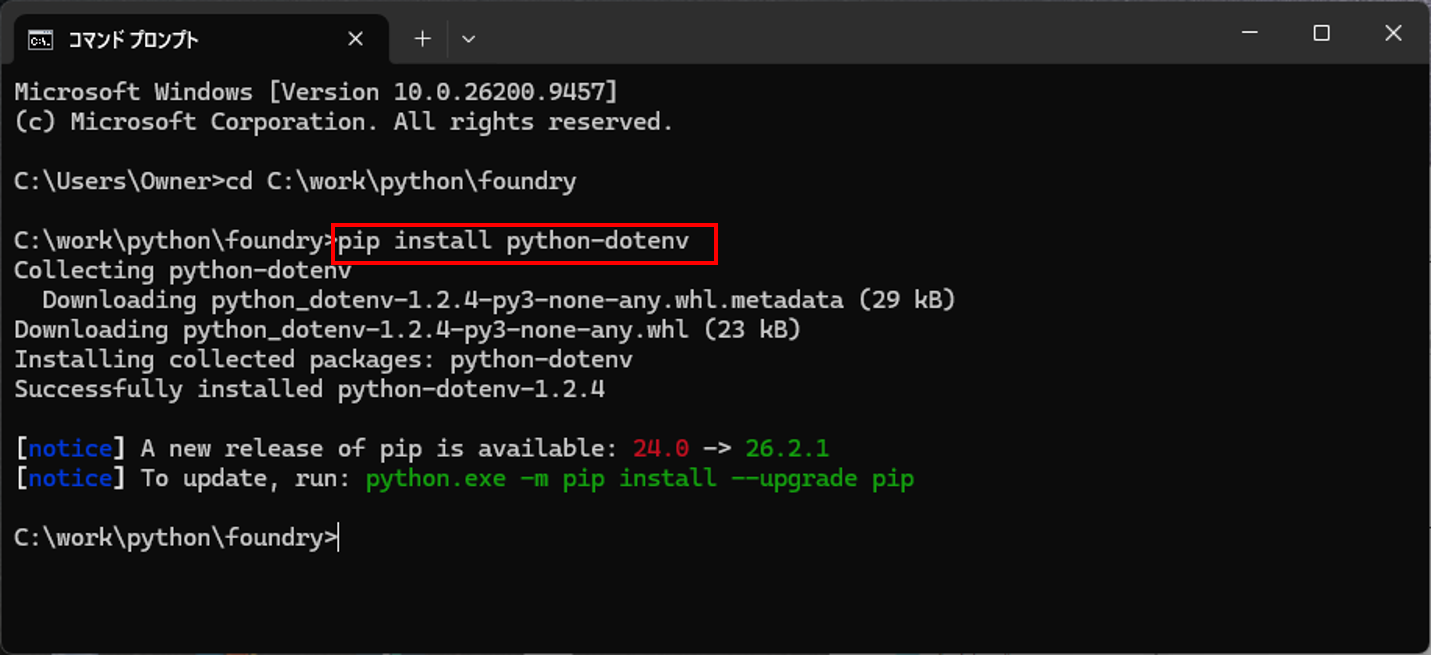
11) 9)のプログラムを実行する際、.envファイルを読み込むためのライブラリが必要なので、「pip install python-dotenv」コマンドを実行しインストールする。
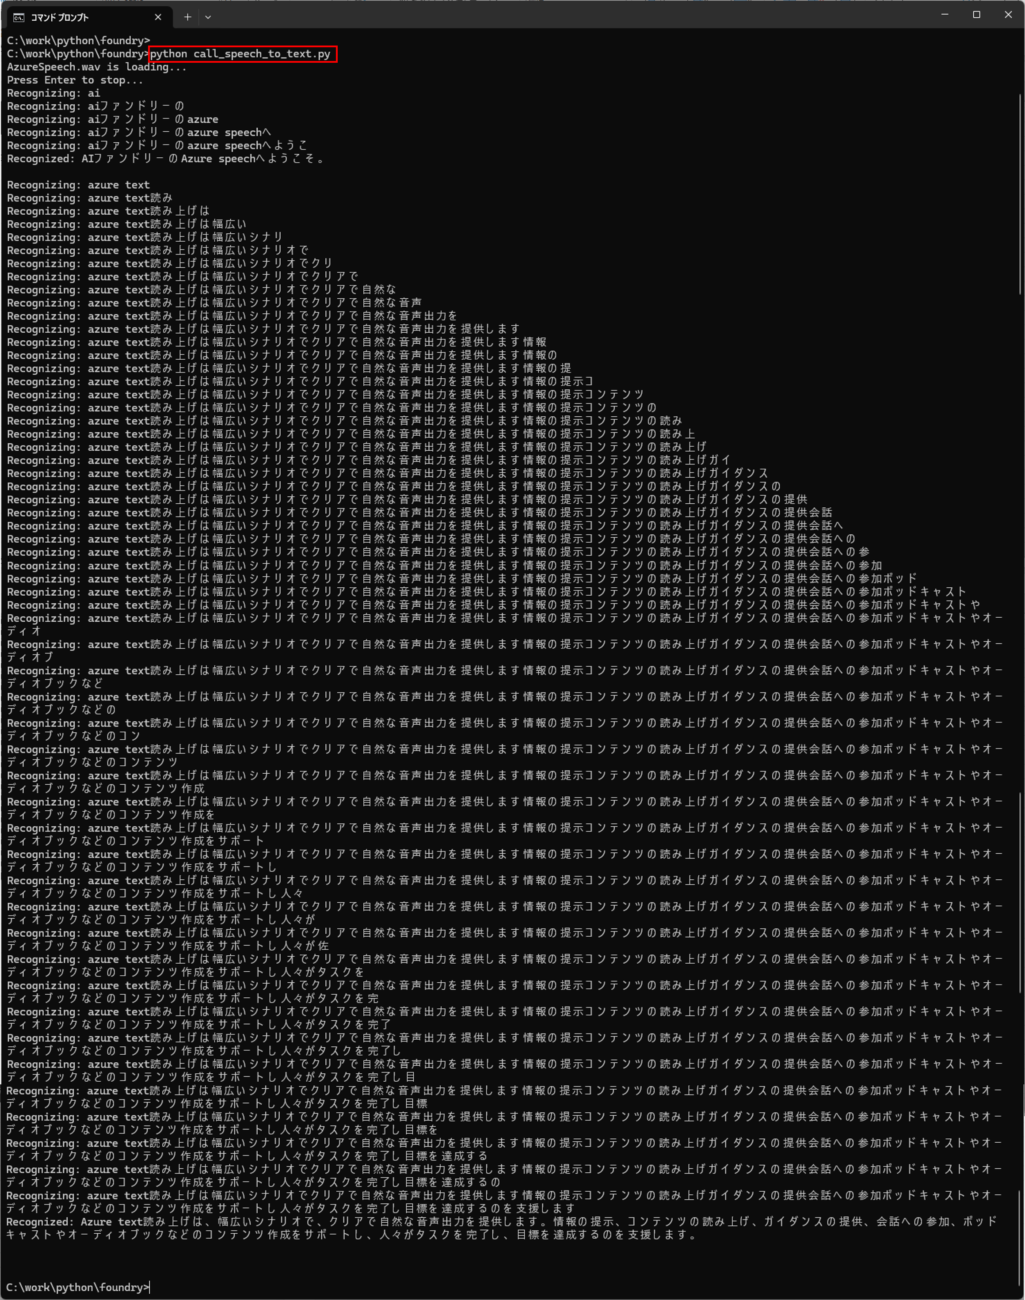
12)「call_speech_to_text.py」を実行した結果は以下の通りで、textに渡したテキストが音声として再生され、音声ファイル(AzureSpeech.wav)が出力されているのが確認できる。
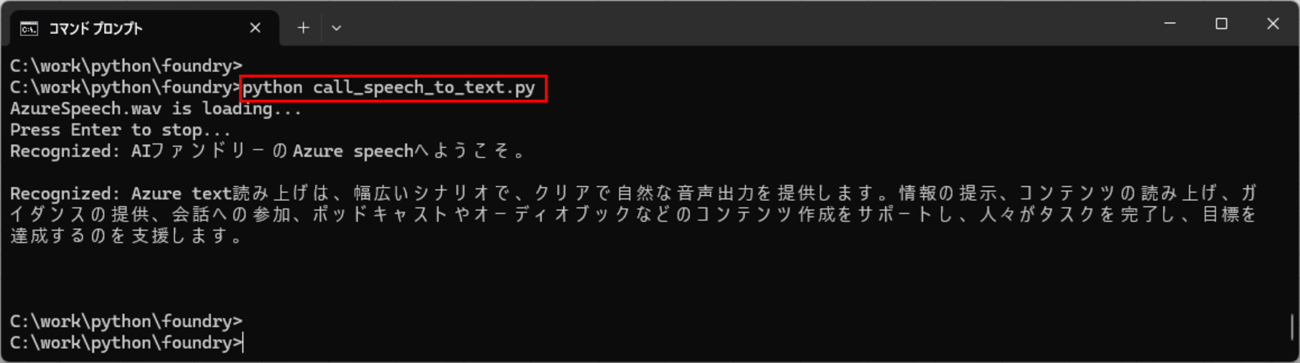
13)「call_speech_to_text.py」内の「recognizing_handler」関数のprint文を削除した後で、「call_speech_to_text.py」を実行した結果は以下の通りとなる。
要点まとめ
- 入力した文字データや文章(テキスト)を基に、人間が話しているような音声をコンピュータで人工的に作り出す技術を音声合成といい、音声をコンピューターが解析し、テキスト(文字)に変換する技術を音声認識という。
- Microsoft Foundryには様々なサービスが用意されていて、音声合成サービスや音声認識サービスが含まれている。